You are currently browsing the tag archive for the ‘greenland’ tag.
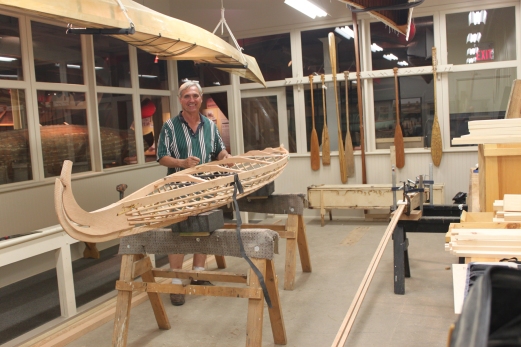
A weekend visit to The Canadian Canoe Museum will often lead to an encounter with a very talented woodworker on our team named Russ Parker. Retired from a long career with the Toronto Fire Services and an avid guitar maker, Russ has also been producing some very fine skin-on-frame kayaks in our Living Traditions Workshop as a Canadian Canoe Museum volunteer.
Read Part 1, Part 2, and Part 3, and Part 4.
We set to work today by installing the last of our decks beams. We had only the deck beam closest to the bow to shape and fit into place. The deck beams and gunwales meet at a compound angle which can prove to be difficult to work with. Properly shaping the deck beams to fit flush with the gunwales can be time consuming and requires a bit of trial and error.
Our next task was to shape the masik. The masik lies towards the bow just ahead of the centre line and will eventually help anchor the cockpit into place. Like the other deck beams, the masik joins the two gunwales together; however, the masik differs in that it is a bent deck beam that needs to be shaped accordingly. There are various ways of shaping the masik: steam bending, laminating and/or cutting it out of a solid piece of wood. Pros and cons are associated with all three methods; however, we opted to laminate numerous thin strips of red oak together.
We first had to build a form reflecting the desired shape of the masik. Once the form was built we simply coated the individual strips with glue and clamped them around the form. Once dry, the masik was ready to be fit into place. We had hoped to begin lashing the deck beams into place this week but ran out of time.
The museum was busy with patrons exploring the various galleries and engaging us in conversation. It was a welcomed distraction. As much as we enjoy working on the kayak, sharing our enthusiasm for this project with the patrons of the museum is equally enjoyable. It was great to see so many children enjoying the various activities set out for them throughout the museum. We did our best to provide hints and clues for the scavenger hunt.
Next week… We start lashing for real this time!
Read Part 1, Part 2, and Part 3.
Day 4 Feb 19th, 2012
Before proceeding to building the flat deck beams, Russ and I had another look at the sheer of the gunwales and determined that a slight hump was still noticeable near the bow of the kayak. A few quick passes with the plane removed the hump and we were ready to move on. Read the rest of this entry »
Day 3: Feb 4th, 2012
Our first task of the day was to continue working on shaping the gunwales – the foundation of the kayak. We now needed to have the tips of the gunwales meet flat together, and one way of accomplishing this task is by using a technique known as kerf cutting. Kerf cutting is accomplished by standing at the end of the kayak and resting a saw on the line where the two gunwales come together. Cutting carefully at the point where the gunwales meet removes an equal amount of wood with each pass of the saw; enabling the gunwales to eventually meet flat together. Read the rest of this entry »
You can read Part 1 by clicking here.
Day 2: Jan 28, 2012
I arrived at the museum a bit early today. I wanted to look at three specific kayaks on display at the museum. All three are Greenland skin on frame kayaks just like the one Russ and I are attempting to build. Clearly Russ and I benefit greatly from having so many valuable resources available to us. Not only can we find actual Greenland kayak artefacts in the museum but the kayak gallery also features a video demonstrating the traditional methods of building skin on frame boats. Conveniently the central figure in the video also happens to be the author of the book Russ and I are consulting during this project. After a half hour admiring the kayak gallery, I joined Russ in the shop and we set to work. Read the rest of this entry »
 We’re Building a Skin-on-Frame Kayak!
Here are Andrew’s notes from the first weekend:
Day 1: Jan 21, 2012
Saturday afternoon couldn’t come fast enough this week. I always look forward to Saturday afternoons but this week was different. This week, and for the next several months I get to assist in the construction of a 17 foot Greenland skin-on-frame kayak! Read the rest of this entry »


